
I first start with scouring flea markets, thrift shops, antique markets and yard sales for interesting vintage tins. I look for ones with nice color and interesting designs that will work for pieces of jewelry. It's not as easy as you may think to find tins that have designs I can use. Most tins you run across are holiday or food tins which are fine if you are making holiday jewelry. I also have a problem of finding tins with beautiful designs but after I get them home I can not bring myself to cut them up!! Ohhhh the wonderful unique jewelry pieces I could design if I could just make myself do that first cut! Maybe someday! For now I'll enjoy them as their original purpose. :)
After I choose a tin I take it apart at the seams, cutting down the corners, removing the bottom and rims around the top.

I use templates, store bought and handmade to lay over interesting areas to see what fits best into the template shape & size I have chosen. Sometimes I like a particular area of a design and I have to lay different templates over the design to see which shape works best.

I cut out the shape that I want. Sometimes I have an idea of what I want to make but then other times I have no idea of what I'm going to do with a piece until after I have it cut out. I guess its whenever the inspiration strikes! The particular piece pictured above looked best cut in a rectangle shape and I decided I wanted to cut two for a pair of earrings!

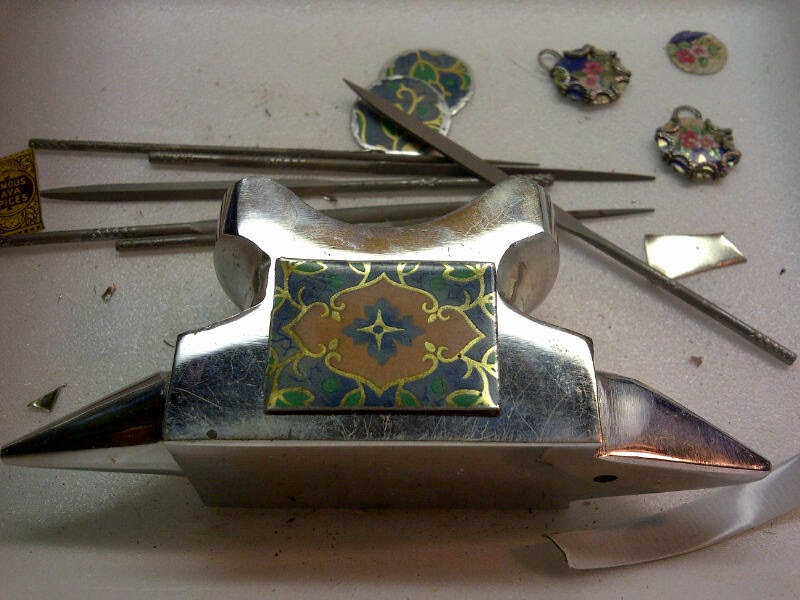

Then each piece has to be filed down to define the shape and smooth out any sharp rough edges


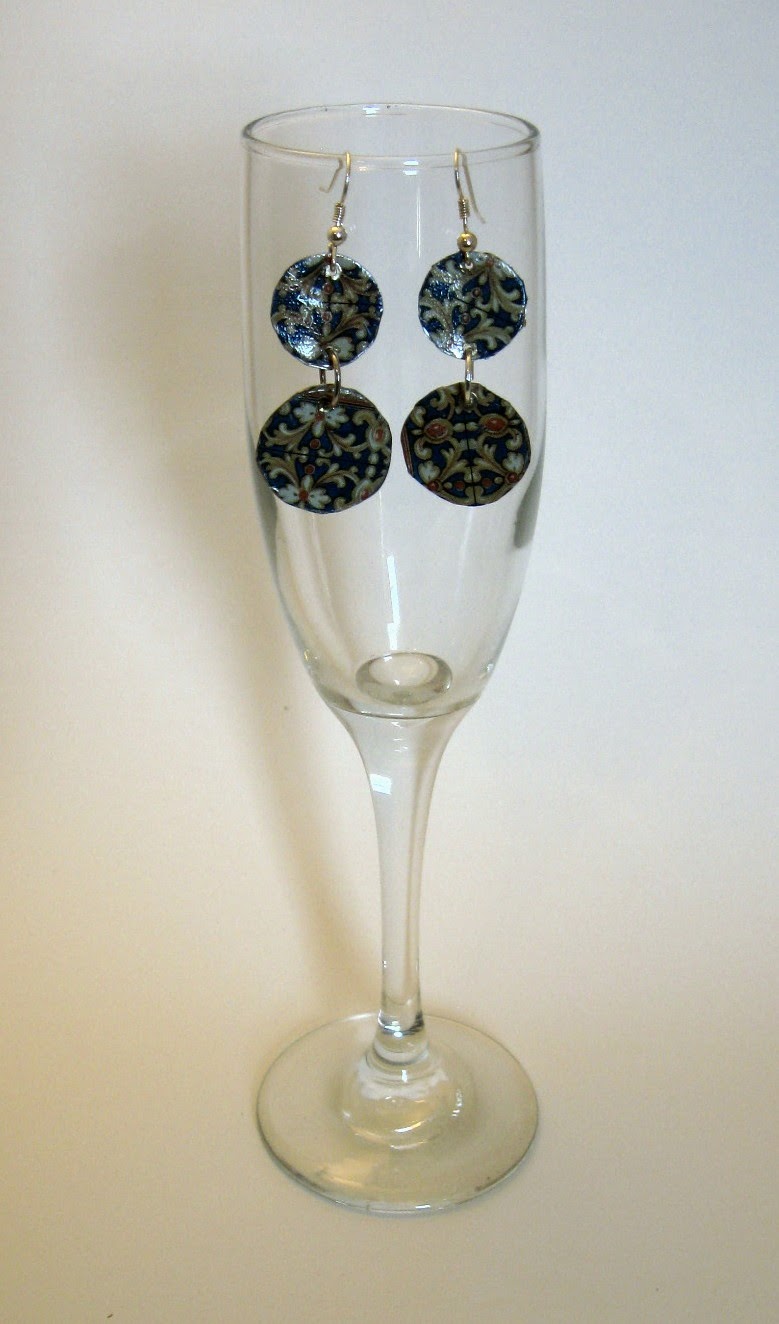
I did this to both pieces then I added beads and other jewelry findings to make this unique pair of recycled vintage tin earrings!

Below is a small gallery of some completed pieces. You will find some in the shop (if not already sold) and some have stayed in my private collection :) I'm also cutting into new tins all the time so check my shop often to see what's new


Unfinished Pieces


No comments:
Post a Comment